Installation Guide
Get Wash up and running in minutes. This guide walks you through installing both the Shopify app and WordPress plugin, then connecting them together.
Prerequisites
Before you begin, ensure you have:
- Shopify store with an active plan (Basic, Shopify, or Advanced)
- WordPress site (version 6.0 or higher)
- PHP 8.1 or higher on your WordPress server
- Admin access to both platforms
Step 1: Install the Shopify App
1.1 Access the Shopify App Store
- Log in to your Shopify admin panel
- Navigate to Apps in the sidebar
- Click Shopify App Store
- Search for "Wash: Blog Manager"
1.2 Install the App
- Click on Wash: Blog Manager in the search results
- Click the Add app button
- Review the permissions and click Install app
- You'll be redirected to the Wash: Blog Manager dashboard
1.3 Complete Initial Setup
- Choose your subscription plan (you can start with Free)
- Note down your Store API Key — you'll need this for WordPress
- The app will create necessary metafield definitions automatically
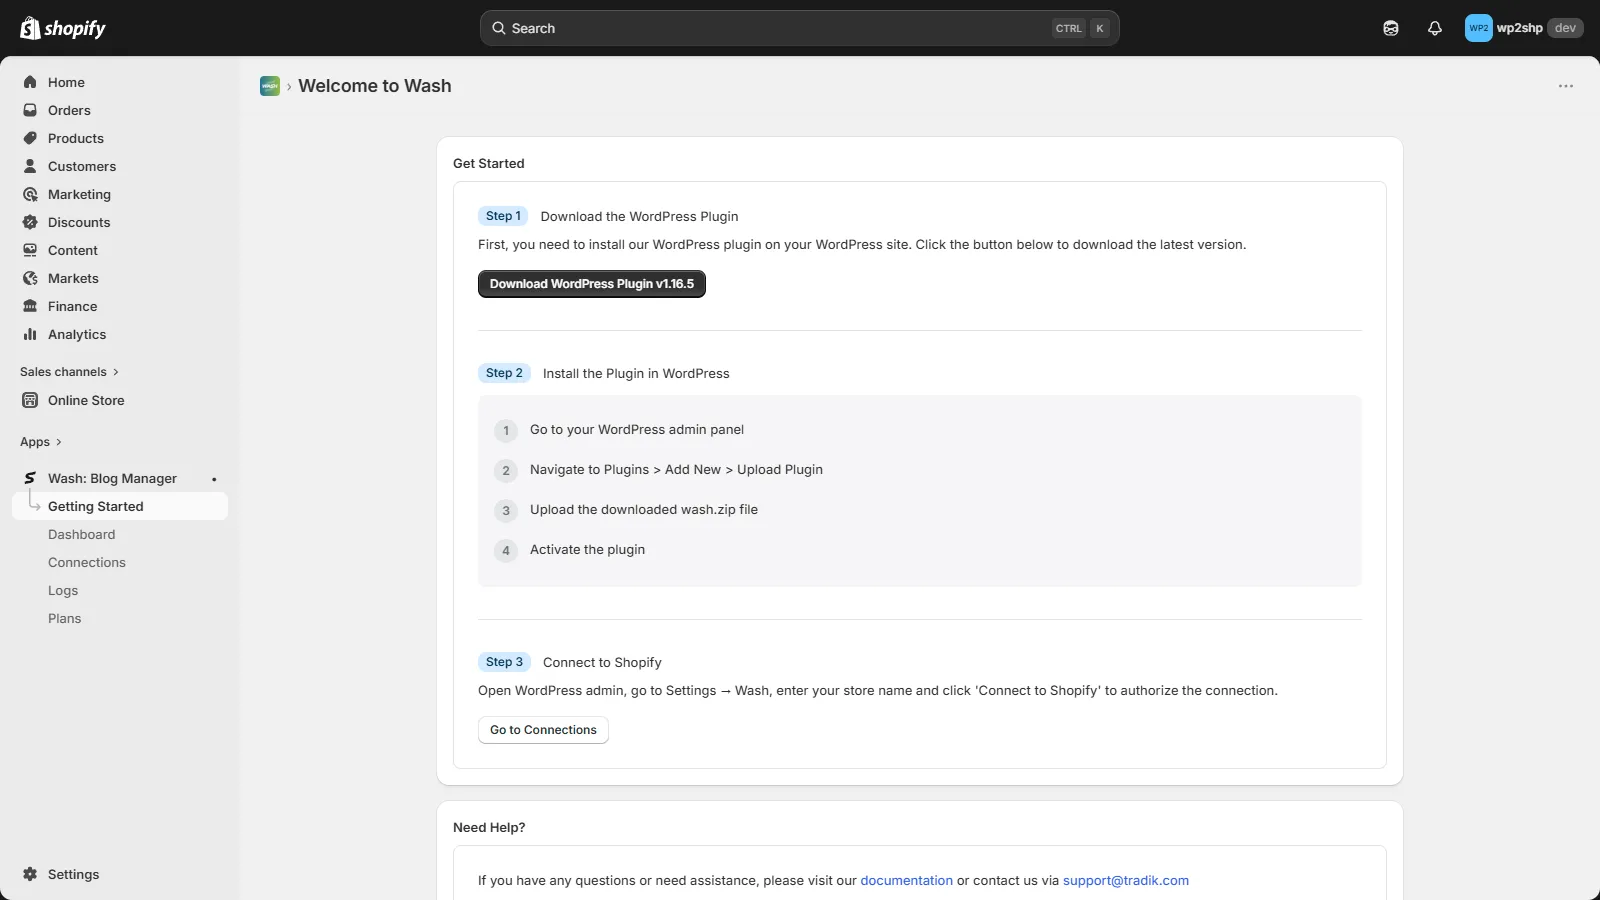
Step 2: Install the WordPress Plugin
Option A: Upload via WordPress Admin
- Download the Wash: Blog Manager plugin ZIP file
- Log in to your WordPress admin panel
- Go to Plugins → Add New
- Click Upload Plugin
- Select the ZIP file and click Install Now
- Click Activate Plugin
Option B: Manual Installation (FTP)
- Download and extract the plugin ZIP file
- Upload the
washfolder to/wp-content/plugins/ - Log in to WordPress admin
- Go to Plugins → Installed Plugins
- Find Wash: Blog Manager and click Activate
Option C: Composer Installation
composer require wash/wordpress-plugin
Then activate via WP-CLI:
wp plugin activate wash
Step 3: Connect WordPress to Shopify
3.1 Access Plugin Settings
- In WordPress admin, go to Settings → Wash: Blog Manager
- You'll see the connection setup page
3.2 Enter Your Credentials
- Shopify Store URL: Enter your store URL (e.g.,
your-store.myshopify.com) - API Key: Paste the API key from your Shopify app dashboard
- Click Connect
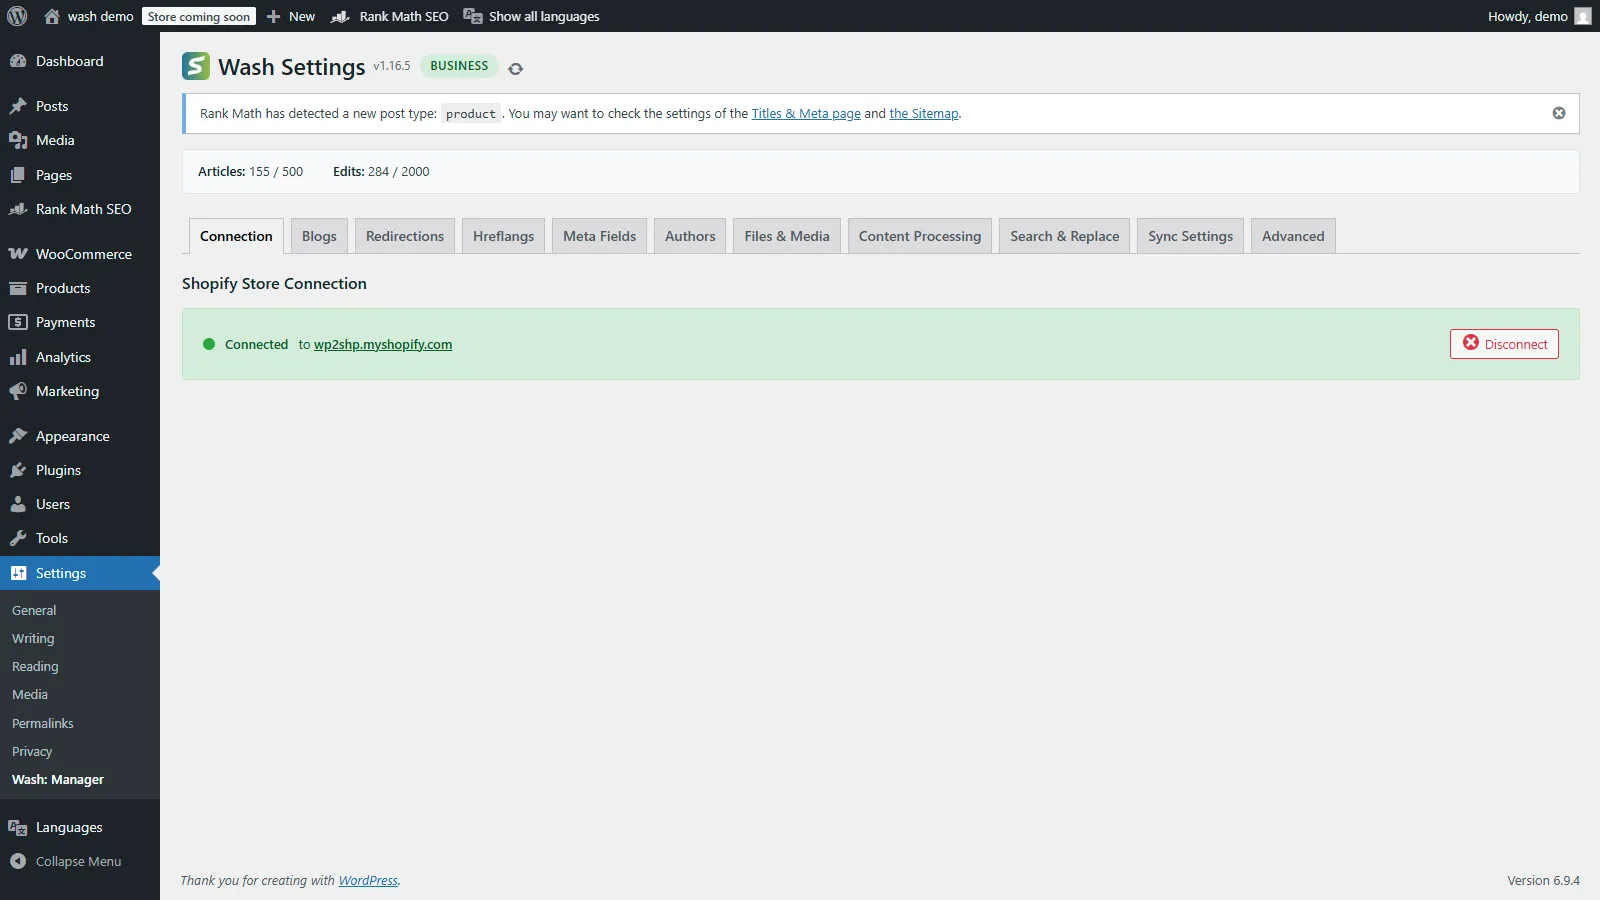
3.3 Verify Connection
After connecting, you should see:
- ✅ Connection status: Connected
- ✅ Store name displayed
- ✅ Available Shopify blogs listed
Step 4: Configure Blog Mappings
4.1 Understand Blog Mappings
Blog mappings tell Wash: Blog Manager which WordPress categories should sync to which Shopify blogs.
4.2 Create Your First Mapping
- Go to Wash: Blog Manager → Blog Mappings
- Click Add New Mapping
- Select a WordPress Category (e.g., "News")
- Select the target Shopify Blog (e.g., "News")
- Click Save Mapping
4.3 Multiple Mappings
You can create multiple mappings:
| WordPress Category | Shopify Blog |
|---|---|
| News | News |
| Tutorials | Guides |
| Company Updates | About Us Blog |
Step 5: Test Your First Sync
5.1 Create a Test Post
- In WordPress, go to Posts → Add New
- Write a simple test post
- Assign it to a mapped category
- Click Publish
5.2 Verify Sync
- Check the Wash: Blog Manager sync status in the post editor sidebar
- Visit your Shopify blog to see the published post
- Verify images and formatting transferred correctly
Step 6: Configure Additional Settings
6.1 Sync Options
Navigate to Wash: Blog Manager → Settings to configure:
- Auto-sync on publish: Automatically sync when posts are published
- Sync featured images: Include featured images in sync
- Author mapping: Map WordPress authors to Shopify metafields
6.2 Advanced Options
- Custom fields sync: Enable synchronization of custom fields
- Smart redirections: Enable URL redirection handling
- Image optimization: Configure image processing options
Troubleshooting
Connection Failed
- Verify your API key is correct
- Check that your Shopify app is installed and active
- Ensure your WordPress site can make outbound HTTPS requests
Sync Not Working
- Confirm the post is assigned to a mapped category
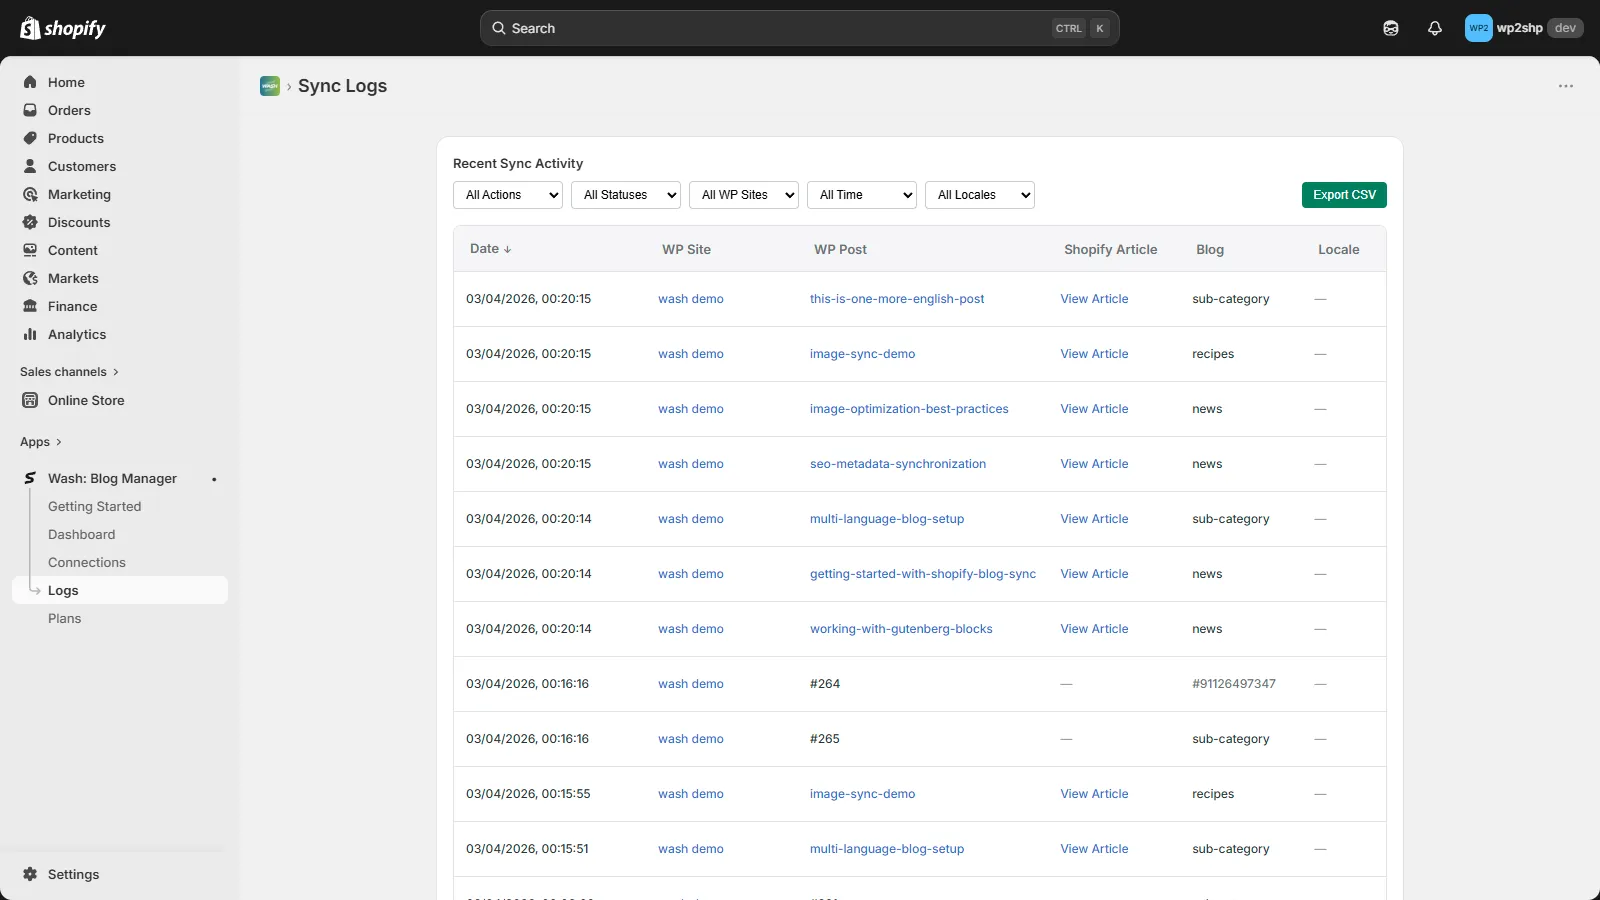
- Check the sync logs in Wash: Blog Manager → Logs (see screenshot below)
- Verify your subscription plan allows more syncs
Sync Icon Keeps Spinning
If the sync icon keeps spinning indefinitely after publishing a post, it usually means the callback from Shopify is being blocked. Common causes:
Cloudflare Protection
If your WordPress site uses Cloudflare with Bot Fight Mode or Under Attack Mode enabled, server-to-server callbacks may be blocked.
Solution — Add WAF Exception Rule:
- Log in to your Cloudflare dashboard
- Go to Security → WAF → Custom Rules
- Create a new rule with these settings:
- Rule name:
Allow Wash Callbacks - Expression:
(http.request.uri.path contains "/wp-json/wash/v1/callback") - Action: Skip (select "All remaining custom rules")
- Rule name:
- Deploy the rule
Security Plugins
WordPress security plugins like Wordfence, Sucuri, or iThemes Security may block API requests.
Solution:
- Go to your security plugin settings
- Add
/wp-json/wash/v1/callbackto the whitelist/allowlist - For Wordfence: Firewall → Blocking → Whitelisted URLs
- For Sucuri: Settings → Hardening → Whitelist
Testing Callback Endpoint
To verify your callback endpoint is accessible, run this test:
curl -X POST "https://your-wordpress-site.com/wp-json/wash/v1/callback" \
  -H "Content-Type: application/json" \
  -d '{"test": true}'
If you see a Cloudflare challenge page or 403 error, the endpoint is being blocked.
Images Not Appearing
- Check that images are properly attached to the post
- Verify your Shopify plan supports file uploads
- Review image size limits in settings
Next Steps
- Connection Settings
- Set up author mapping
- Enable smart redirections
- Choose the right plan for your needs
Need Help?
If you encounter any issues during installation:
- Check our FAQ section
- Review the Shopify limitations
- Contact support through the Shopify app dashboard